Get Started
- Download and install VCV Rack.
- Download the latest version of the plugin from the Downloads section of this page.
- Move the downloaded .vcvplugin file into the plugins sub-folder of your Rack user folder.
Downloads
Download the latest version of the plugin for your operating system. See the release notes for details.
Operation Guide
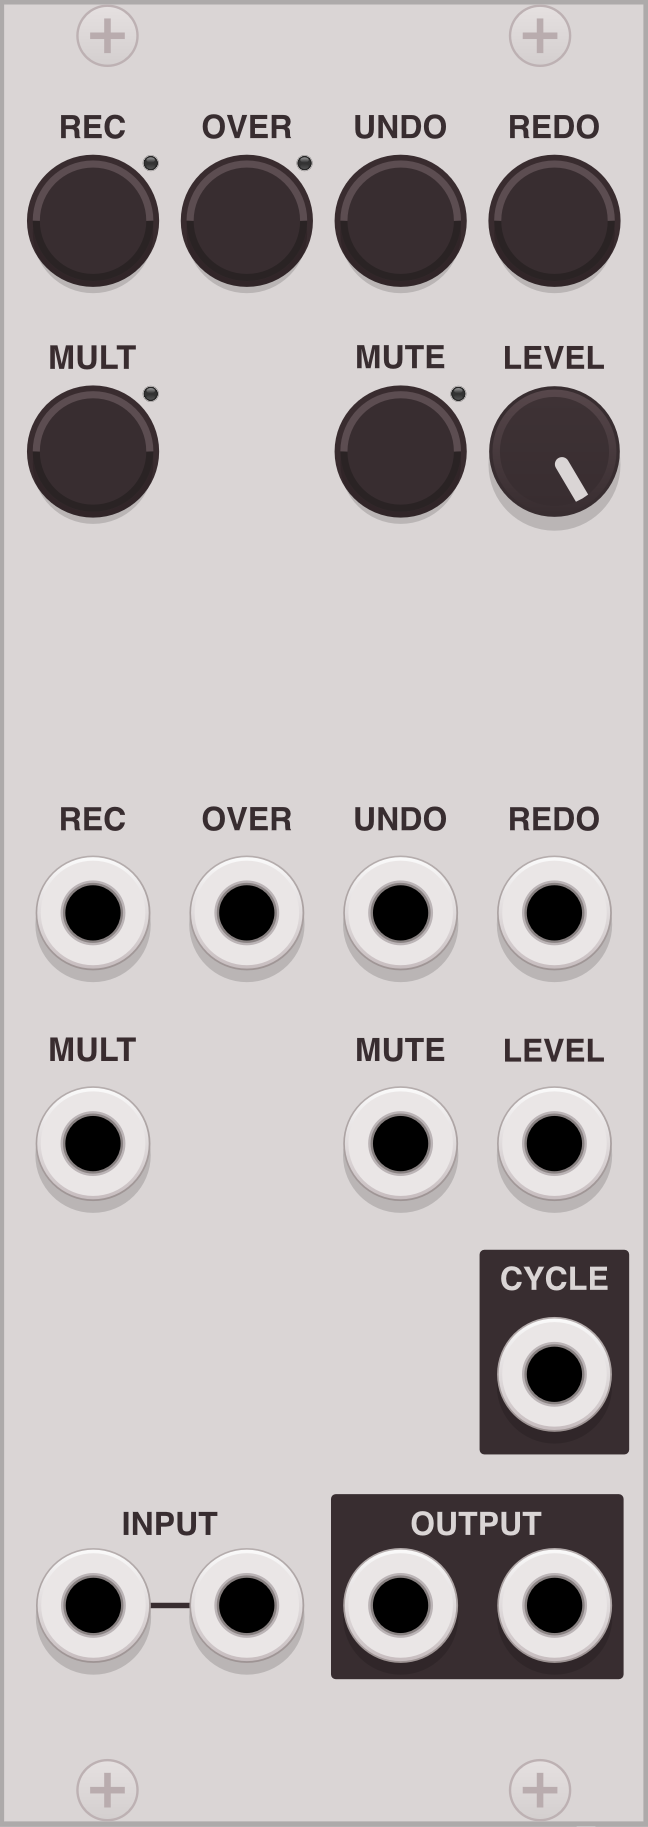
Start by patching a signal to one or both of the module’s input ports. This could be a live instrument signal from your audio interface, or an internal source like an oscillator. Make sure at least one of the module’s main output ports is connected to an audio output.
Record a loop
- To record a new loop, press the REC button once.
- To stop recording the loop, press the REC button again once.
- The loop will play indefinitely. Each time the loop repeats, a trigger is sent to the CYCLE output.
Overdub an existing loop
- To record an overdub, first make sure a loop is playing.
- To start recording an overdub, press the OVER button once. Incoming audio will be recorded on top of the original loop.
- To stop overdubbing the loop, press the OVER button again once. The loop will continue playing along with the overdubbed audio.
Change the length of an existing loop
The length of a loop can be made shorter or longer using the MULT button.
- To multiply a loop, first make sure a loop is playing.
- To start multiplying the loop, press the MULT button once. Continue until you reach the desired loop length.
- To stop multiplying the loop, press the MULT button again once. The loop will play indefinitely at its new length.
Undo a recording
Pressing the UNDO button will go back to the previous recording in your loop history. Press the REDO button to move forward in the history. Pressing UNDO repeatedly will eventually bring you back to the point before your first recording, silencing the output.
Change trigger modes
The Record, Overdub, and Multiply operations can work in one of two trigger modes: Toggle orSustain. In Toggle mode, the first press will start recording. The second press will end the recording. In other words, it is a latching switch. In Sustain mode, recording starts when the button is pressed and continues until the button is released. In other words, it is a momentary switch.
When a control is set to Toggle mode, sending a trigger pulse to its CV input will start recording. Send another pulse to end the recording. When a control is set to Sustain mode, recording will start when an open gate is received on the CV input. Recording will end when the gate closes.
Change the mix mode
Set mix mode to Mix to blend the input signal and the loop. Mix mode is best for a traditional live looping effect when you want to hear your dry signal at all times.
Set mix mode to Insert to mute the input signal while the loop is playing. Insert mode is best for glitch, stutter, or beat-repeat type effects.
Set mix mode to Gate to mute the input signal at all times. Gate mode is appropriate when using the looper as a send effect.
Re-trigger a loop
Press the TRIG button to immediately restart playback from the loop’s starting point.
Reset the looper
Press the RESET button to stop playback and reset the looper.
Increase the maximum loop time
Use the Max. loop time option in the context menu to increase the maximum loop time up to 6 minutes at 48 kHz. The default maximum loop time is 30 seconds, or 11 MB of stereo audio at 48 kHz. A new default can be set by selecting your preferred loop time, then choosing Preset → Save default from the module’s context menu. Changing the maximum loop time will clear the module’s sample memory without warning.